
Flipkart, one of India’s leading e-commerce giants, has just unveiled its latest innovation in digital payments: the Flipkart UPI handle. This move aims to elevate the digital payment experience for its vast customer base, which exceeds a whopping 500 million users.
Introducing Flipkart UPI
With the introduction of Flipkart UPI, you now have access to a range of exciting loyalty features tailored to enhance your shopping journey. From Supercoins to Cashbacks, Milestone benefits, and brand vouchers, there’s something special waiting for you post-launch.
Powered by Axis Bank, Flipkart UPI initially caters to Android users, allowing for seamless registration with the @fkaxis handle. Once onboarded, you can effortlessly transfer funds and complete checkout payments directly through the Flipkart app.
But what sets Flipkart UPI apart?
- It’s not just about convenience; it’s about revolutionizing the way you shop online. This offering streamlines the payment process, whether you’re making purchases within the Flipkart marketplace or with offline merchants.
- With just a few clicks, you can now recharge your accounts and settle bills, all within the same platform.
What’s more, Flipkart has been rigorously testing its UPI feature since the previous year. This means you can trust in its reliability and seamless integration within the app.
Say goodbye to juggling between different payment apps – Flipkart UPI keeps it all under one roof.
How Do You Get Started with Flipkart UPI?
It’s simple.
Just open the Flipkart app and look for the “scan & pay” option. Whether you’re scanning a QR code or initiating a fund transfer, everything you need is right at your fingertips.
Plus, with the “My UPI” feature, you can easily manage your bank accounts and RuPay credit cards hassle-free.
In a landscape where digital payments are king, Flipkart’s UPI offering stands out as a game-changer. By empowering you with greater control and convenience, it’s paving the way for a more seamless shopping experience.
So, what are you waiting for?
The future of digital payments with Flipkart UPI is today.
Steps to Access Flipkart UPI in App
Here are the detailed steps to access Flipkart UPI!
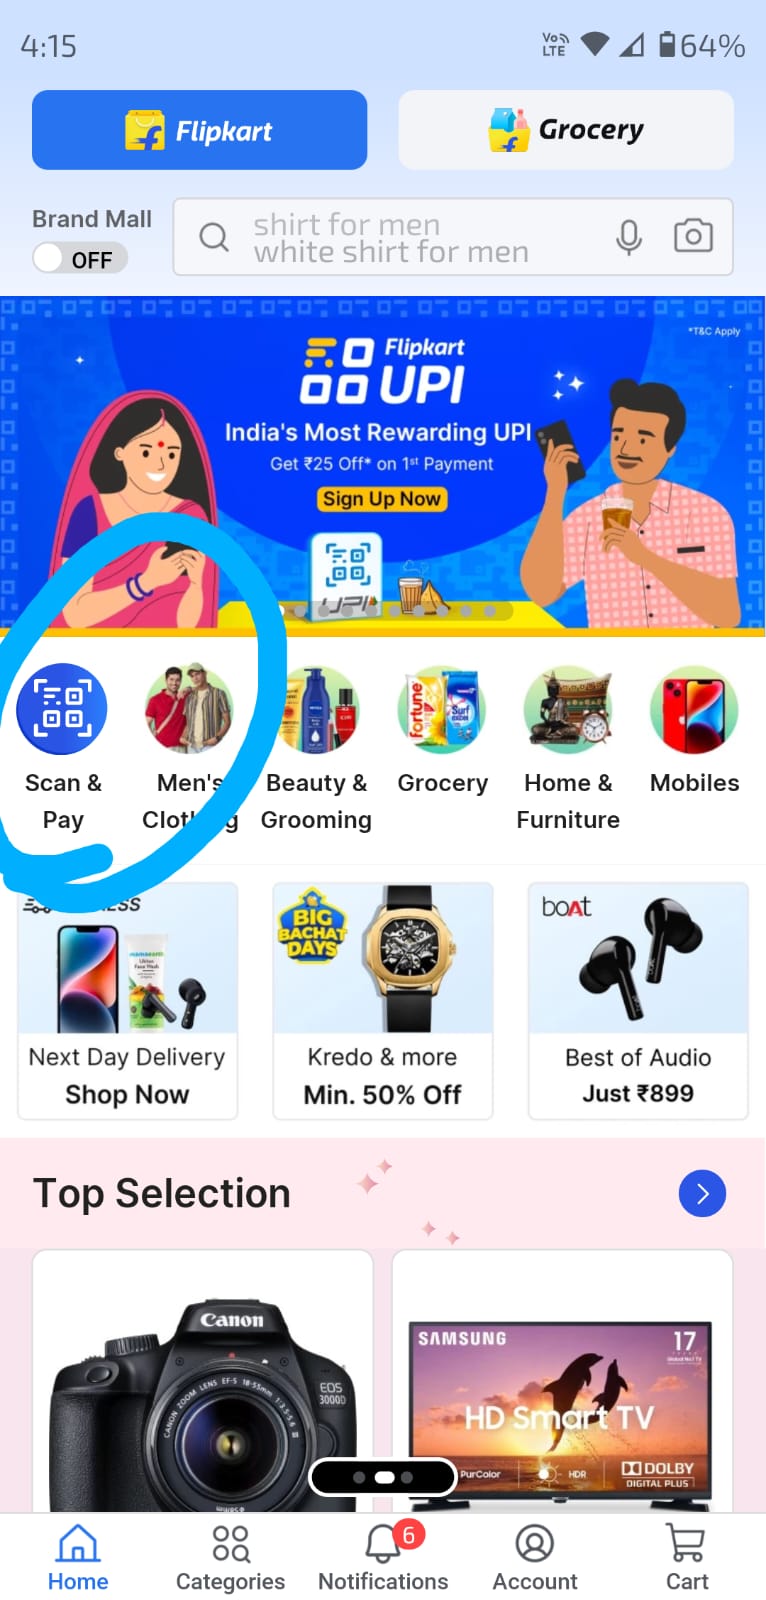
- Open the Flipkart App – Begin by launching the Flipkart mobile application on your Android device. You can find the app icon on your home screen or in the app drawer.
- Navigate to “Scan & Pay” – Once the app is open, look for the “Scan & Pay” option. You can usually find this feature prominently displayed on the app’s homepage or in the navigation menu. The following screenshot shows it:

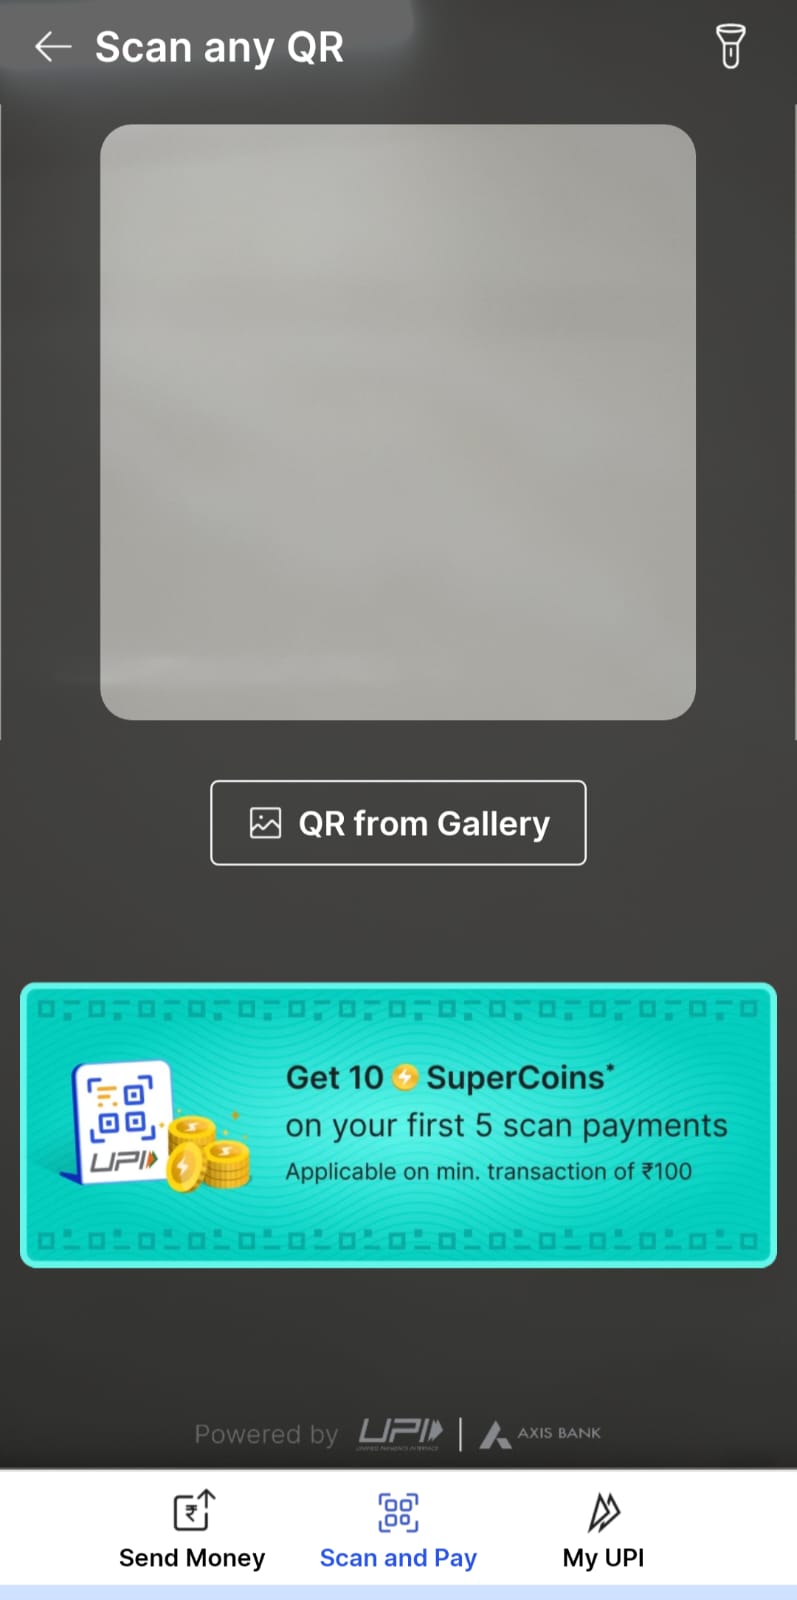
- Access the QR Scanner – When you select “Scan & Pay,” the QR code scanner will automatically activate. This scanner allows you to scan QR codes for making payments or initiating transactions.
- Explore Payment Options – Within the QR scanner interface, you’ll find various payment options. These typically include “Send Money” and “Scan and Pay.” Choose the option that best fits your transaction needs. The following screenshot shows the QR Scanner with various payment options:

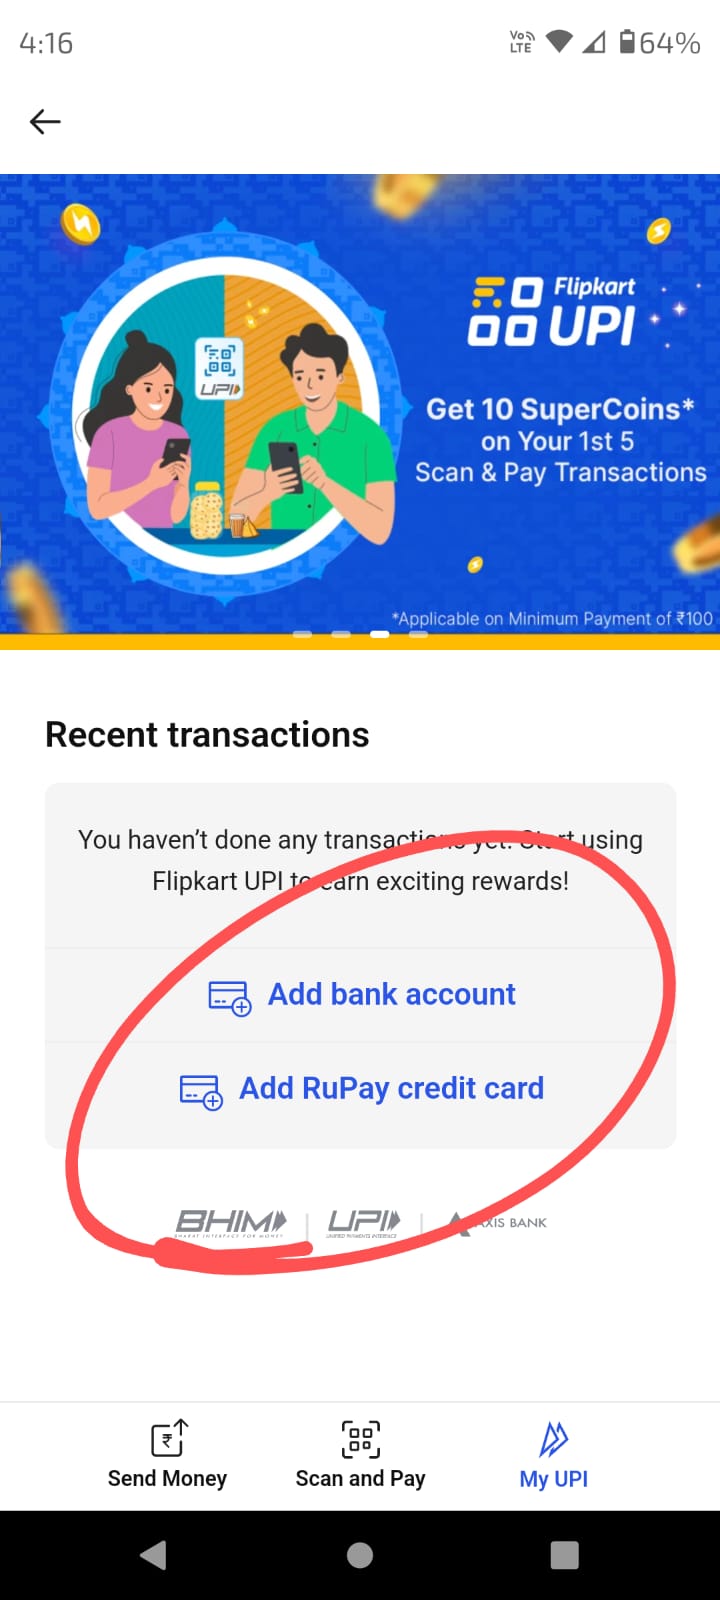
- Click on “My UPI” – Alongside the payment options, you’ll see another option labeled “My UPI.” Tap on this option to access your Flipkart UPI account settings.
- Add Bank Account – Inside the “My UPI” section, you’ll find options to manage your UPI settings. Look for the option to “Add Bank Account” and select it. The following screenshot clearly shows how to add your bank account to flipkart UPI:

- Enter Bank Details – Follow the prompts to enter your bank account details. This typically includes providing your bank account number, IFSC code, and other necessary information.
- Verify Bank Account – Once you’ve entered your bank details, Flipkart will verify your bank account. This may involve confirming your identity through OTP (One-Time Password) verification or other security measures.
- Add RuPay Credit Card (Optional) – If you wish to link a RuPay credit card to your Flipkart UPI account, you can do so from the “My UPI” section. Look for the option to “Add RuPay Credit Card” and follow the prompts.
- Confirmation and Activation – After adding your bank account and any optional credit cards, you’ll receive a confirmation message indicating that your Flipkart UPI account setup is complete. Your account is now ready for use.
By following these steps, you can easily access and set up Flipkart UPI, enabling seamless digital payments directly within the Flipkart app.
EXPLORE MORE
 A Step-by-Step Guide to Access Google Gemini Advanced
 How to Access Google Gemini Pro 1.5: A Step-by-Step Guide
 Step-by-step Guide to Chat with Grok AI for X Premium Plus Users
 Integrate ChatGPT into Excel: A Step-by-Step Guide to Automation
 How to Use Bing AI Image Generator? Step-by-Step Guide
 How to Restore an Old Photo Using ChatGPT: A Step-by-Step Guide